
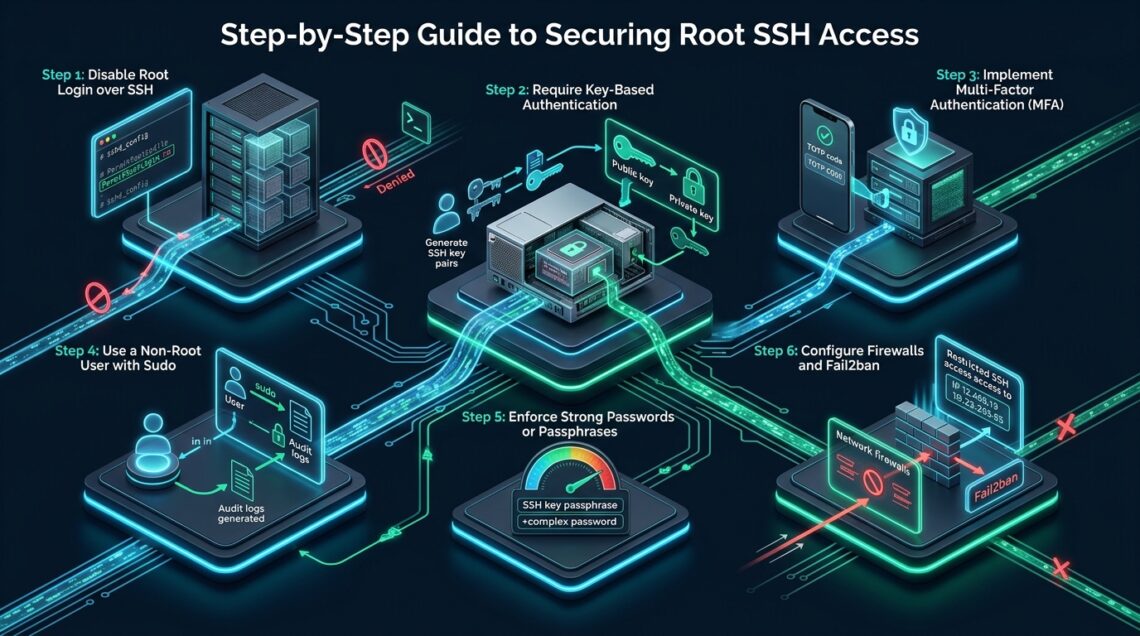
Exposing port 22 directly to the public internet invites thousands of automated credential-stuffing and brute-force botnet attacks per hour, placing enterprise Linux deployments under severe threat of unauthorized root compromise. Without a defense-in-depth access architecture, weak passwords and unconstrained privileged accounts quickly lead to credential exfiltration, malicious payload execution, and costly infrastructure downtime. At MeraHost, our production clusters enforce hardened, zero-trust SSH access models that eliminate direct root logins while guaranteeing sub-millisecond cryptographic handshake latency.
What Is the Most Secure Method to Protect Root SSH Access?
PermitRootLogin no in OpenSSH, enforce modern Ed25519 cryptographic keypairs while disabling password authentication (PasswordAuthentication no), mandate a dedicated non-root wheel/sudo user with MFA, bind SSH to custom non-standard interfaces or private VPN subnets, and deploy active rate-limiting via Fail2ban or nftables.In enterprise server administration, the superuser (root, UID 0) represents the ultimate security perimeter. Granting direct external access to UID 0 through SSH violates the fundamental security principle of least privilege. Because the root username is universal across all Linux distributions, attackers do not need to guess usernames—they only need to brute-force the password or exploit an unpatched cryptographic weakness. By enforcing an intermediate authentication tier with strict role-based access control (RBAC), security engineers gain immutable accountability, granular audit trails, and multi-layered intrusion resistance.
Enterprise SSH Security Matrix: Default vs. Tuned Production
A standard out-of-the-box Linux installation prioritizes broad legacy client compatibility over defensive posture. In contrast, an enterprise-hardened configuration eliminates obsolete ciphers, restricts privileges, and integrates automated perimeter defenses. The comparative matrix below outlines the critical differences between default and production-hardened SSH deployments:
| Feature / Metric | Standard / Default | Tuned / Production |
|---|---|---|
| Root Access Exposure | Permitted (PermitRootLogin yes) |
Disabled (PermitRootLogin no via Sudoers) |
| Authentication Method | Interactive Passwords or RSA-2048 | Ed25519 Keypairs + Hardware FIDO2 Security Keys |
| Brute-Force Attack Surface | Unrestricted (Thousands of scans/hour) | Automated IP Jail (Fail2ban + nftables rate-limiting) |
| Multi-Factor Authentication (MFA) | Disabled (Single factor) | Enforced via PAM (libpam-google-authenticator / FIDO2) |
| Cryptographic Negotiation | Legacy ciphers (3DES, CBC, SHA1 fallback) | Strict Modern KEX (Curve25519 + ChaCha20-Poly1305) |
| Session Inactivity Timeout | Indefinite / Uncapped keepalive | Strict auto-termination (300s / 2 probes) |
| Audit Trail & Accountability | Shared root login (Zero traceability) | Named admin accounts logged via auditd + sudo log |
Step 1: Provisioning Dedicated Admin Accounts with Granular Sudo Rights
Before modifying any SSH daemon configurations, you must establish an unprivileged operational account with administrative privileges. This guarantees you maintain access after disabling direct root authentication.
Execute the following commands to create a dedicated administrative user, assign a high-entropy password, and add the user to the elevated group (wheel on RHEL/Rocky/AlmaLinux, or sudo on Debian/Ubuntu):
# Create administrative user with home directory and bash shell
useradd -m -s /bin/bash sysopsadmin

# Set a robust, randomized administrative password
passwd sysopsadmin

# Add user to sudo group (Debian/Ubuntu)
usermod -aG sudo sysopsadmin

# OR add user to wheel group (RHEL/CentOS/AlmaLinux)
usermod -aG wheel sysopsadmin
Next, configure fine-grained sudo controls inside /etc/sudoers.d/90-sysopsadmin to enforce timestamp timeouts and mandatory logging. Run visudo -f /etc/sudoers.d/90-sysopsadmin and insert:
# Enforce password authentication for sudo and limit credentials caching to 5 minutes
Defaults:sysopsadmin timestamp_timeout=5
Defaults:sysopsadmin log_year, logfile="/var/log/sudo.log"
sysopsadmin ALL=(ALL:ALL) ALL
Architecture Note: Never disable root SSH access before verifying that your newly created sudo user can authenticate cleanly with their SSH private key and escalate privileges via
sudo -i. Keep an active root shell open in an adjacent terminal session during all configuration changes.
Step 2: Generating Modern Ed25519 SSH Keypairs
Legacy RSA keypairs (even 2048-bit or 4096-bit) suffer from slower cryptographic computation and larger public key signatures. Edwards-curve Digital Signature Algorithm (Ed25519) provides 128-bit security level with superior resistance to side-channel attacks, compact 68-character keys, and near-instant verification.
On your local administrative machine, generate an Ed25519 keypair protected by 100 key derivation rounds of bcrypt:
# Generate Ed25519 key with enhanced bcrypt KDF protection
ssh-keygen -t ed25519 -a 100 -C "sysopsadmin@merahost-prod-cluster" -f ~/.ssh/id_ed25519_merahost

# Copy public key to the remote server
ssh-copy-id -i ~/.ssh/id_ed25519_merahost.pub sysopsadmin@<YOUR_SERVER_IP>
On the destination host, verify that the permissions of the .ssh directory and authorized_keys file are strictly restricted. OpenSSH will reject authentication if permissions are too permissive:
# Ensure strict ownership and permissions on remote server
chmod 700 /home/sysopsadmin/.ssh
chmod 600 /home/sysopsadmin/.ssh/authorized_keys
chown -R sysopsadmin:sysopsadmin /home/sysopsadmin/.ssh
Step 3: Deploying Production OpenSSH Hardening Configuration
Modern Linux distributions support drop-in configuration files located in /etc/ssh/sshd_config.d/. Using drop-in files ensures that upstream distribution package updates never overwrite your production security policies.
Create the hardened configuration file at /etc/ssh/sshd_config.d/99-hardened-ssh.conf with the following production-grade directives:
# ====================================================================
# MeraHost Production SSH Hardening Configuration
# File: /etc/ssh/sshd_config.d/99-hardened-ssh.conf
# ====================================================================

# 1. Access & Privilege Controls
PermitRootLogin no
PasswordAuthentication no
PermitEmptyPasswords no
PubkeyAuthentication yes
AuthorizedKeysFile .ssh/authorized_keys

# 2. Restrict Administrative Access to Explicit Users
AllowUsers sysopsadmin

# 3. Brute-Force & Handshake Throttling
MaxAuthTries 3
MaxSessions 2
LoginGraceTime 30

# 4. Session Inactivity & KeepAlive Controls
ClientAliveInterval 300
ClientAliveCountMax 2
TCPKeepAlive no

# 5. Disable Unnecessary Features & Attack Vectors
X11Forwarding no
AllowAgentForwarding no
AllowTcpForwarding no
PermitUserEnvironment no
UsePAM yes
PrintLastLog yes

# 6. Modern Cryptographic Primitives (Zero Legacy Fallbacks)
KexAlgorithms curve25519-sha256,[email protected],diffie-hellman-group16-sha512,diffie-hellman-group18-sha512
Ciphers [email protected],[email protected],[email protected]
MACs [email protected],[email protected]
HostKeyAlgorithms ssh-ed25519,rsa-sha2-512,rsa-sha2-256
Before reloading the daemon, rigorously test the configuration syntax. Running an invalid configuration file could prevent the service from starting, causing severe administrative lockout:
# Validate sshd configuration syntax without affecting the running daemon
sshd -t

# If no errors return, gracefully reload the SSH service
systemctl reload sshd || systemctl reload ssh
Operational Precaution: Using
systemctl reloadrather thansystemctl restartsends a SIGHUP signal to the master daemon, re-reading the configuration while leaving existing established SSH connections completely intact. Test a new connection in a separate terminal before closing your current session.
Step 4: Layering Multi-Factor Authentication (MFA) via PAM
While public key authentication provides immense protection against remote dictionary attacks, stolen private keys from compromised developer laptops remain an attack vector. Combining cryptographic SSH keys with Time-based One-Time Passwords (TOTP) guarantees that an attacker with a compromised private key cannot access your servers without physical access to the 2FA authenticator token.
Install the Google Authenticator PAM package on your operating system:
# Debian / Ubuntu
apt-get install -y libpam-google-authenticator

# RHEL / Rocky / AlmaLinux
dnf install -y epel-release && dnf install -y google-authenticator
Log in as your administrative user (sysopsadmin) and initialize the TOTP token generator:
# Run interactive authenticator setup as non-root user
google-authenticator -t -d -f -r 3 -R 30 -W
Next, configure PAM by updating /etc/pam.d/sshd. Append the following directive at the top of the file to require the TOTP verification code:
# Append to /etc/pam.d/sshd
auth required pam_google_authenticator.so nullok
auth required pam_permit.so
Finally, update /etc/ssh/sshd_config.d/99-hardened-ssh.conf to enforce both authentication methods sequentially:
# Require both Public Key and TOTP Code
KbdInteractiveAuthentication yes
AuthenticationMethods publickey,keyboard-interactive
Step 5: Intrusion Prevention and Dynamic Perimeter Rate-Limiting
Even with root login disabled and password authentication removed, malicious scanners consume CPU cycles and memory by continuously establishing TCP handshakes. Deploying Fail2ban dynamically inspects log events and injects kernel-level firewall drops via nftables or iptables.
Install and configure Fail2ban with an aggressive enterprise jail at /etc/fail2ban/jail.d/sshd-hardened.local:
# ====================================================================
# File: /etc/fail2ban/jail.d/sshd-hardened.local
# ====================================================================
[sshd]
enabled = true
port = ssh
logpath = %(sshd_log)s
backend = systemd

# Aggressive Banning Rules
maxretry = 3
findtime = 600
bantime = 86400
banaction = nftables-multiport

# Whitelist trusted NOC and bastion IP ranges
ignoreip = 127.0.0.1/8 ::1 192.168.1.0/24
Enable and start the Fail2ban service, then verify that the jail is actively monitoring incoming authentication events:
systemctl enable --now fail2ban
fail2ban-client status sshd
For high-throughput enterprise systems handling thousands of legitimate concurrent connections, managing complex perimeter firewalls and host-based intrusion systems requires robust, carrier-grade hardware. Hosting your mission-critical infrastructure on MeraHost Enterprise Cloud gives you access to enterprise-grade physical firewalls, 10Gbps DDoS mitigation, and hardware-accelerated NVMe storage, ensuring your hardened SSH bastions remain lightning fast and perpetually available under all threat conditions.
Step 6: Continuous Audit Logging and Security Telemetry
Regulatory compliance standards (such as PCI-DSS v4.0, SOC 2 Type II, and ISO 27001) mandate centralized logging and audit trails for all privileged access commands. Configure the Linux Audit Daemon (auditd) to monitor all elevation actions performed by sudo users.
Create a dedicated audit rule file at /etc/audit/rules.d/99-ssh-security.rules:
# Track all modifications to SSH configuration and authorized keys
-w /etc/ssh/sshd_config -p wa -k ssh_config_changes
-w /etc/ssh/sshd_config.d/ -p wa -k ssh_config_changes
-w /etc/pam.d/sshd -p wa -k pam_ssh_changes
-w /etc/sudoers -p wa -k sudoers_changes
-w /etc/sudoers.d/ -p wa -k sudoers_changes

# Record all sudo privilege escalations
-a always,exit -F arch=b64 -S execve -C uid!=euid -F euid=0 -k elevated_privileges
Load the rules into the running audit daemon with augenrules --load. Review active security telemetry using ausearch -k elevated_privileges to verify that all administrative root executions are indelibly documented.
Frequently Asked Questions About SSH Root Hardening
Why should I disable direct root login instead of just using a complex root password?
Because the root username is universal across all Linux systems, automated botnets focus 100% of their computational power on brute-forcing UID 0. Disabling root login eliminates this vector completely. Furthermore, direct root logins leave zero audit trail regarding which human administrator executed a command, whereas sudo enforces individual accountability.
What is the fail-safe recovery procedure if an administrator gets locked out?
If locked out of SSH, enterprise platforms like MeraHost provide out-of-band VNC / KVM console access directly through the infrastructure control plane. From the out-of-band console, you can authenticate locally as root or your admin user, diagnose journalctl -u sshd, and correct configuration syntax or firewall blocks.
Why is Ed25519 preferred over RSA-4096 in modern cryptographic benchmarks?
Ed25519 is based on the Twisted Edwards curve, offering superior cryptographic resilience, immune design against cache-timing side-channel attacks, and significantly faster signature verification speeds than RSA-4096, while producing much shorter 68-character keys.
Does moving SSH from port 22 to an alternate port provide real security?
Moving to an alternate port reduces log noise from dumb, non-targeted automated script kiddie bots by up to 95%. However, it is security through obscurity and does not prevent port scanners like Nmap from discovering OpenSSH. You must combine any port shift with key authentication, disabled root, and Fail2ban.
Deploy Enterprise-Grade Production Infrastructure
Need guaranteed performance with zero price hikes? Host mission-critical workloads on MeraHost with pure Enterprise NVMe, LiteSpeed Web Server, and Same Renewal Price, Always (starting at ₹99/mo).
Leave a Comment